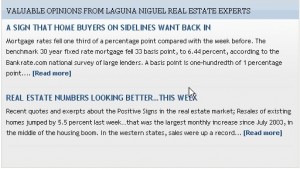
Blog Posts are entries that display on your homepage under the heading “Valuable Opinions from…” or “Conversations with…” (or a slight variation.)

Typically, an excerpt will show with a link to “enjoy more” or “read more.” Your reader can click on that link and it will take them you the post page to read the entire post.
Create a post in Five or Six Easy Steps:
1) Login to your WordPress Administration Panel (if you are not already logged in)
2) Click Post (along the left side) and click Add New. This will take you to the “Add a New Post” page.
3) Once at this page, you will be able to fill in the Blanks. Choose a meaningful, keyword rich, provocative title and enter it in the title box. Next write your post, using the post box. Notice the full function WYSIWYG (what you see is what you get) editor. You may Bold, Italicize, Number, Bullet point, etc. just like in you favorite word processor.
4) Scroll down and choose (click the checkbox) a Category from the box on the right. For a simple post (not a listing post, which will be covered later) choose one or two categories… Always choose “conversations'” (this is “opinions” in earlier VR sites.”) In addition to “opinions” or “conversations” choose any city or area category that the subject of this post is about.* This will ensure the post excerpt appears on the Home Page of your site, under the appropriate community, if your post has anything to do with one of your target areas. Here I chose “conversations” or “opinions” and “Brentwood”.
*If you need to add a new category simply click “+ Add New Category” at the bottom of the box. Next type in the name of the category you wish to add, choose if you want the category to be a Parent Category or a subcategory of one of the others, then click the “Add” button. Once you have done this, click the check box next to the category you have just added.
5) You may preview the post, save the post (as a draft, to come back to it at any time) or Publish the post. Remember, even after a post is published, you may come back and edit it at any time…
Go to the “Publish” box on the right side of the page. To preview the post, click the “Preview” button and you will be taken to another page to view exactly what this post will look like once it’s published. To save this post as a draft, simply click the “Save Draft” button and a box will pop up at the top of the page letting you know that your draft has been saved. Otherwise…
6) When you are ready, click Publish.
To Edit a Post:
Go to Post (along the left side) and click Edit. This will take you to a page with a lists of posts. Once there, to edit a post hold your mouse over the post that you would like to edit and a a list of options will pop up under the title. Click “Edit” and you will be brought into that post where you can edit away.
When you are done editing, click “Update Page” and your post is updated.
Here is a video that demonstrates How to Add and Edit a Post…
In addition, when you create posts, readers are able to comment. This is a good thing as it creates your community. You have the ability to moderate these comments. You can approve a comment, delete a comment, edit a comment or mark a comment as spam. Typically comments are legitimate, in which you would approve, or spam. Because these sites are VERY visible, they tend to get a lot of spam. When looking at you comments, look at the URL the comment came from and the body text of the comment. If the URL is not Real Estate related, and/or the body has LOTS OF LINKS in it, it is likely spam…
Here is a VIDEO TUTORIAL on moderation comments.


 Catch Our Feed
 Subscribe via Email
 Follow Our Tweets
 Friend Us On Facebook
 Watch Us On Youtube